Monday, August 31, 2009

A Love Affair with Capers and Cucumbers

I had this whole plan for today’s post that involved regaling you with my prowess of experimentation and improvisation (yet again) in the art of baking (yet again), but, alas, the weekend baking god granted me neither luck nor forethought enough to pull off a flourless/white sugar-less/almost butter-less chocolate cake. And, in the end, you are probably tired of reading about breads and cakes and the like (or at least you find me somewhat insane to continue cranking the oven up to 375 degrees at the end of August.

The cake wasn’t terrible, though, and looks kind of charming in that fallen, flat, brownie kind of way:

And if you happen to have the proper ingredients, you should probably try it (as I will probably attempt, again). The cake is almost certainly delicious, since it comes from the almost unfailing repertoire of Orangette, and really does contain only chocolate, sugar, eggs, and butter (okay, and a tad bit of flour). How could that possibly be bad?

But I come not to bring you cake, but capers. And cucumbers (for more cute recipes starting with the letter “c” and the rest of the alphabet, see Gourmet’s Sesame Street-esque September issue) – not combined together, but as two new starring roles in my usual roster of recipes (God. Can’t get enough alliteration. I promise to stop – now).

I first tossed capers into a batch of pesto a couple of weeks ago on a whim. I had been craving a tapenade, but having neither olives nor anchovies, yet copious amounts of backyard basil, I made what I thought was a compromise. A bit shy at first, I added only a few, careful not to disturb the careful balance of basil and olive oil. Struck, however, by the capers’ miraculous ability to blend right in to the emulsion, I added a few more and then a few more until I achieved that perfect hint of briny umami underneath the spicy and sharp overtones.

So. Good.

Yesterday I was again faced with too much basil – lemon basil this time – and again pulled out the Cuisinart. This time I skipped the garlic and the parmesan, and subbed walnuts for pinenuts, creating more of a pistou than a pesto, but once again added the requisite capers. This time the caper flavor shone through more fully without the competition of raw garlic and cheese, which, when tossed with raw baby squash, paired perfectly with frenchified white beans (I prepared them as I would have cooked puy lentils, with carrots and shallots) and a filet of Coho salmon (beautiful, wild caught, on sale, from New Seasons).

On the side I enjoyed the newest version of watermelon salad – with cucumber. I suppose I stole the idea from the aforementioned issue of Gourmet; however, they suggest serving the melon Greek-style with tzatziki sauce. The yogurt sounded weird, and a bit too filling to fit the rest of my meal, but the cucumber?

I have already spoke of my new respect for the vegetable in a certain beet and avocado salad crafted by a certain “Waters woman,” and I have since been looking for other new ways in which to use its crunch. Watermelon seemed the perfect match. Both are crisp, refreshing, subtle, and both pair perfectly with mint and lime (oh cucumber Ricky,* I love you so).

I chopped and de-seeded half of my yellow watermelon (yes, mom, it had real seeds – gotta love farmers’ markets!) and added de-seeded and thinly sliced cucumber (from about a two-inch chunk), about ¼ cup mint leaves in a chiffonade, and the juice of half a lime. Crunchy, cool, and with a bit of an acidic tang from the lime, this is the perfect fruit salad to eat every day for the rest of the summer – or at least until the melons are no longer ripe. Come to think of it, this combination would probably work with any ripe melon you can find, or even a mixture. Go wild!

*For my new favorite summer cocktail, muddle a couple slices of lime and a couple slices of cucumber with a couple mint leaves. Add ice and 1½-2 ounces of Plymouth or Aviation gin. Shake and pour into a highball glass. Top with soda. Sip. Sigh.

Friday, August 28, 2009

New Tastes / Pho Oregon

Add one point to the offal team:


It may be blurry, but it definitely is what you think it is - tripe. I ate it. And I enjoyed it. A little chewy, a little meaty, a lot of texture, whichever stomach this type of tripe comes from, it's certainly delicious and I think you should try it.

I also think you should get out and eat the rest of this yummy bowl of pho (number #2, in case you're wondering, with everything except the meatballs):


It is way worth the trip up 82nd during rush hour.

Do it.

Pho Oregon. 2518 NE 82nd Avenue. Portland, OR 97220. 503-262-8816.


Pho Oregon on Urbanspoon

Wednesday, August 26, 2009

Busy, Busy, Busy


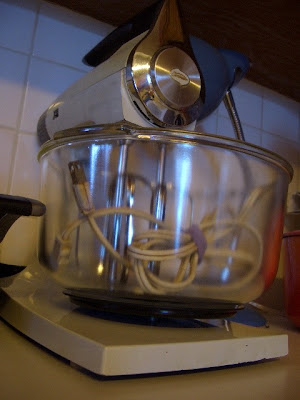
To piggyback a bit off of Monday’s post, I’ve got some more excellent news! I’ve gotten another internship working for the Arts and Culture editor at an alternative weekly here in Portland. Hopefully I’ll be doing some food writing (!!) for them in the near future, and I will definitely keep you posted. On top of this, I’ve been moving back into my real house, unpacking my new kitchen toys (like this, my very retro Mixmaster):


and bouncing around between interviews. It feels great to be back to what I think of as my home now, and today is the first day I’ve felt really … settled … in a long time.

In the spirit of settling down and getting comfortable, I buckled down and made some sandwich bread (I know – more baking. Now that I am no longer in need of comfort food, I promise to share something not requiring an oven soon. Promise). This particular bread recipe is actually what I immediately imagine when confronted with the idea of homemade bread. My father has been baking this Tassajara loaf on and off for a looong time. The nutty, yeasty smell that begins wafting out of the oven about twenty minutes into its baking time transports me back, in true Proustian fashion, to lazy Sunday afternoons, sneaking a peek at the rising bread, and the taste of that first warm slice from the heel. It may not be the fanciest bread, or the most “world-class,” but it satisfies in a way that only a hearty hippie loaf can.

The version that follows is my own interpretation of Tassajara’s standard formula for bread, and not exactly like my father’s. I quartered their original recipe (4 loaves is three too many for little ol’ me). I recommend it smeared with honey, piled with left-over ratatouille, or toasted and topped with thick slices of summer tomatoes, kosher salt, and black pepper.


Wheat and Flax Sandwich Bread
(adapted from the Tassajara Bread Book)

2 cups lukewarm water
about ½ tablespoon dry active yeast
about 1 tablespoon molasses
½ cup dry milk
about 2 ½ cups whole wheat bread flour (I use King Arthur or Bob’s Red Mill)
about ¾ tablespoon kosher salt
1/8 cup canola oil
about 1 cup additional whole wheat bread flour
½ cup wheat bran (Bob’s Red Mill)
½ cup ground flax seeds (Bob’s Red Mill)
about 1 cup or so all-purpose flour for kneading
sesame seeds

Dissolve yeast in the water. Let it sit for a couple of minutes to proof (All this means is that it should start to bubble a bit – if it doesn’t, the yeast is old and you’ll need to try again with a new package). Add the molasses and dry milk. Stir to combine. Add the first 2 ½ cups of whole wheat flour and beat well with a wooden spoon (Tassajara says 100 strokes – try counting it, and you’ll definitely see the batter transform around stroke 75 or so. Pretty cool). Let the batter rise for about an hour. Again, you should see bubbles – this means that the yeast is working.

After the first rise, add the salt and oil – stir until oil is emulsified. Add the rest of the whole wheat flour, wheat bran, and flax. At this point, a dough should form and pull away from the sides of the bowl (it will still be sticky). If you need to, add more whole wheat flour.

Generously flour your counter with all-purpose flour (you can continue to use whole wheat here if you want; the white flour will lighten the bread up a bit) and turn the dough out of the bowl. Knead for 10-15 minutes, or until the dough is smooth, elastic, and no longer sticky. Put the dough, covered with a damp towel, in an oiled bowl and let rise for 50 minutes to an hour. It should double in bulk. Punch the dough down and let rise for 40-50 minutes more. Again, it should double in bulk.

Preheat the oven to 350 degrees.

To shape the dough into a loaf, turn the ball out onto a lightly floured counter and knead a couple of times. Gently roll into a log shape, about the length of your bread pan. Square off the sides and ends, and pinch the seams together. Grease the pan with a little bit of canola oil. Place your loaf seam side up in the pan and flatten out with the backs of your fingers. Turn the loaf over so that the seam is on the bottom and press it, once again, into the shape of the pan. Cover again with the damp towel, and let rise for about 20 minutes, or until the top of the loaf reaches the top of the pan. Cut three slits about ½ inch deep into the top, and sprinkle with sesame seeds.

Bake for about an hour, or until the top is a deep brown and the bread sounds hollow when tapped. Let cool until manageable, and turn the bread out onto a cooling rack. Let it cool completely for neater slicing, or, if you don’t care about such things, dive in right away. There’s not much in this world better than fresh warm bread.

Monday, August 24, 2009

A Cake and a Confession (and also, some great news!)

Okay, okay, great news first: I got a job! A real, paying job in a real, live restaurant! As soon as I pass the necessary background screenings (note: drug testing – not as awkward as predicted), I will be working as a breakfast and lunch hostess at a hotel restaurant downtown. It’s right on the river, is run by a former Atlantan, and, hopefully, I’ll get to train as a server if things go well. I’m pumped! Take that second-highest-unemployment-rate-after-Detroit!

Anyway, on to the cake, by way of a confession: I have a bookmarking problem. I read a lot of food blogs, so I look at tons of photos and recipes every day. Most recipes, as long as they seem at least somewhat decent or beautiful in some way, get a big fat apple-D (oh, bookmark command, why did I ever memorize you?). On a good day, I’ll only bookmark a couple. On a bad day, it can reach 20 or 30. If you were to pull up my bookmarks menu, you would at first be confronted with a long list of to-be-sorted, poorly named links waiting for a day when I have a patient, boring, minute. If you were so lucky to reach the folders, you would see a highly organized folder-within-folder catalogue of hundreds upon hundreds of ideas.

Most of these ideas stay just that – ideas, fantasies, intangible wisps of information. They sit, gathering digital dust in my 21st century file book. Sometimes, I go through and delete a couple of stale ones, those that have gone so out of season or out of fashion that I would probably never touch them. On more ambitious days, I’ll actually click on the link, revisit the recipe, and prepare some version of it.

Saturday was one such day. A few of my friends just moved into a new house and were throwing a house warming party, asking guests to bring along some sort of edible or drinkable donation.

I made cake. Specifically, the yogurt cake that found Orangette’s Brandon. Bookmarked ages ago, it has always sat in the back of my dessert brain as an object of future experimentation. The cake is a snap to whip together, and the recipe is easy to manipulate. I added peaches, cornmeal, and a bit of olive oil to the original recipe, and left out the lemon zest and glaze, giving the cake a complex savory note to counter the sweetness of my overripe peaches.

Sophisticated enough to stand out in a crowd of homemade desserts, but rustic enough for a barbeque, this cake was a definite success. And, as I had found out about my job (!) only a few minutes before digging into my first piece, the cake was eaten in celebration as well.


Celebratory Peach Yogurt Cake
(adapted from Orangette)

½ cup plain yogurt
½ cup cane sugar
½ cup light brown sugar
3 eggs
1 cup unbleached all-purpose flour
½ cup medium-ground cornmeal
2 teaspoons baking powder
¼ cup canola oil
¼ cup olive oil
1-2 cups peeled, diced peaches

Preheat the oven to 350 degrees and butter a nine-inch round cake pan. I used a springform pan here out of necessity (temporary house = temporary lack of baking supplies), which was too tall, but did help with the removal of the cake when it was done.

In a big mixing bowl, combine the yogurt, sugars, and eggs with a whisk (this makes it easier to combine the yogurt (I don’t pre-stir) with the other ingredients) until well combined. Add the flour, cornmeal, and baking powder, and mix (now you can switch to a spoon) until just combined. Add the oils and stir. Molly warns (and rightly so) that the batter will take quite a bit of stirring until the oil combines. But be patient, it will work.

Pour half the batter into the cake pan. Pour on the peaches, and try to distribute them as evenly as possible. Top with the rest of the batter and smooth with a spatula. Bake for about 30-35 minutes until the edges are golden (the top will still be a bit pale) and a toothpick comes out clean. Cool the cake on a rack for about 20 minutes in the pan, and then turn out of the pan until cooled completely.

Friday, August 21, 2009

Coast Picnic

In a few minutes, I will get in the car for what has now become a weekly jaunt out of the city with Matt. We're heading west, to Astoria, and perhaps other parts of the coast for the day. I've packed a picnic-ish lunch (hopefully the sun will be shining - or at least the clouds won't be raining - so we can sit outside):

a baguette, left-over okra and cranberry bean succotash, melon, curry chicken, port salut, chocolate, and my new favorite hot sauce/condiment - an onion and chili combo I adapted from a post on Serious eats.

Garlicy and spicy with my Thai chili interpretation (oh Fubon, you have served me well), the sauce has gotten better each day since I whipped it up on Wednesday morning. I've been eating it with a left-over polenta-white bean-kale combination, brightening the dish's otherwise muted flavors (grumpy mood = bland food). Anyhow, I imagine that the sauce will be delicious smeared on top of bread with a nice hunk of cheese.

Moroccan-Thai Chili Sauce
(adapted from Serious Eats)

1/2 Walla Walla onion, diced
4 cloves garlic, diced
2-3 Thai chilis, chopped
1 teaspoon paprika
1 teaspoon cumin
salt and pepper, to taste
1-2 teaspoons lime juice, or more, to taste
2 tablespoons water
1/4 cup (or less) olive oil

In a food processor, blend together onion, garlic, chilis, paprika, cumin, salt and pepper, lime juice, and water. Taste and adjust salt, pepper, and lime. With the processor running, drizzle in oil just until emulsified. Taste again and adjust seasonings as necessary.
Store in the fridge and eat on anything that needs a pick-me-up.

Wednesday, August 19, 2009

A New Plan

Guys. I’ve been a bit … absent lately. For lack of a better explanation – post-college life is tough. And when I’m struggling, it shows up in my food and my writing. I’ve been avoiding it. But I don’t want this blog to turn into a whiny pity-party rant site, I’ll leave it at that.

Well, that and the promise of a new plan. Cooking and writing and creating and writing some more is good for me, and so I’ve decided to pledge to you, wide-open blog-o-sphere to begin posting consistently. On Mondays, Wednesdays, and Fridays I will put something up. No matter what.

All of this said, I have been doing plenty of cooking and eating in the past couple weeks. A girl’s got to eat, especially when feeling glum. And there’s little better than bread baking to feed my hunger for challenge, change, experimentation (except maybe croissants, but I still have some in the freezer). I recently bought a Peter Reinhart book – Crust and Crumb, not The Bread Baker’s Apprentice (the availability of a paperback copy is extremely persuasive to my new budget-minded self) – and have been doing a lot of scheming about fermented, multi-stage bread.

I’ve done a bit of bread baking in the past, but never anything as involved as his recipes. I’ve made plenty of quick breads and pizza dough, a couple loaves of sandwich bread and one deliciously crackly boule. But that’s about it. Now that I have so much time on my hands, I plan to start working my way through his recipes, starting, as soon as I get back into my real kitchen next week, with French bread.

Before I get there, though, I’ll leave you with the slightly simpler como I made last week. It uses a Poolish starter – a wet, gurgling bowl of yeast, flour and water left to ferment overnight – and a high ratio of water to flour, which yields a sticky dough. I didn’t have any trouble folding the dough in its prescribed patterns, but I think that I used too much flour. I would also recommend a longer final proof on the dough, as well as a note to made sure that all of the seams on the loafs are sealed and on the bottom. A couple of my loaves cracked open in the oven, which diminished the final texture.

Como Bread
(from Apple Pie, Patis, and Pate)

For percentages and proportions by weight, see the link above. I have a digital scale waiting for me back at my real house, and will get to use it soon, but for these loaves, I used volume measurements.

First, make the Poolish:
Combine ¾ cup bread flour, ¾ cup room temperature water, and 1/8 teaspoon yeast until well mixed. Let the mixture stand at room temperature for 12 to 16 (I let it go the full 16) hours before making the final dough.

The next day, combine all of the Poolish, 2 2/3 cup bread flour, ½ cup whole wheat flour, 1 ¼ cup water, ¼ teaspoon yeast, and 2 teaspoons kosher salt until well combined. Knead the dough on a floured counter for about 6 to 8 minutes or until it becomes a more cohesive ball of slightly springy dough. It will still be sticky.

Let the dough sit in a lightly floured bowl for one hour at room temperature. After the hour, stretch the dough into a rectangle, about 10x12 inches. With the long side facing you, fold in thirds, as you would a letter. Fold the dough a second time, in the same way, with the short sides going towards the center, so you end up with a sort-of square ball. (If this is confusing, there are great pictures on the link, so check those out). Let the dough sit for another hour, repeat folding, and let sit for one last hour. Divide the dough into three pieces (or however many loaves you want) and let rest for about 15 minutes. Stretch each piece into a strip, about 16 inches long, and seal the seams. (I made two baguette-like loaves, and one small boule, because I only had a couple of small pans. They all cooked in about the same time, so I don’t think that it matters too much which shape you choose). Let the shaped loaves proof on parchment-lined baking sheets for at least 30 minutes (or maybe an hour?) before cooking.

Preheat the oven to 475 degrees (make sure that it gets this hot!). Boil one cup-ish of water and pour into a heavy pan (a cast iron skillet works well) and stick this under the rack on which you will cook the bread (the boiling water will create steam in the oven, which is crucial to the creation of a crispy crust on your bread). Immediately stick the bread in the oven. The loaves should cook in about 20 minutes. I rotated the pans around after about 10 minutes, but make sure that you wait at least that long so you don’t mess up the initial oven rise. The finished bread will be golden brown and will sound hollow when tapped.

Let cool as long as you can stand it, and serve with various accoutrements, such as cheese, prosciutto, and summer tomatoes.

Sunday, August 9, 2009

Secret Ingredients

Chocolate cake holds a special place in my heart. Voluptuous, decadent, powerful – the best cakes subtly pull at your taste buds, calling out for just. one. more. bite. Chocolate cake was my first love, and my first personalized recipe. I remember finding a story in the Atlanta paper: Cocoa makes it chocolately. Pulling out the scissors, I carefully dissected a perfect cut-out of the directions, photo intact. I remember gathering the ingredients, measuring, sifting, smelling. And then, an idea: Why follow the recipe exactly? Rustling through the spice cabinet, I found a few things not normally in my thirteen-year-old idea of chocolate cake, pinching, shaking, dusting, melting, concocting my creation.

It’s funny, though: I remember the process more than the actual taste of the cake itself. I know that it tasted good – it had too, since the recipe has stayed in my and my family’s dessert repertoire since. I’ve changed my secret ingredients a bit since that first time, but the process remains the same. The experience of self-discovery and experimentation leading to “Kate’s World Famous, Extra-Specially Good Chocolate Cake” with SECRET INGREDIENT! was vastly more influential to my growth in the kitchen than any specific recipe. I learned to trust my instincts and not to shy from creativity and improvisation.

But I still feel a bit unfaithful when I bake a different cake. Anything else is strange, not mine. Many times these new cakes are better, more mature creations, with ganache instead of butter cream, and coffee instead of water. My newest such infidelity was a giant chocolate cake pulled from Gourmet.

At once pure and mature, this cake was as chocolate as you can get without ditching the flour. I used the best cocoa and bar chocolate I could find, and coated it with a rich, thick ganache. Matt, my housemates, and I have been enjoying the cake for about a week now (true to form, this is a beast of a cake – make sure to keep it in the fridge so it lasts). And I’ve been doing my best to savor the moist interior and slick topping, but it’s not quite doing it for me. With every bite, I imagine my other cake, the cake, in all its unrefined glory.

So here, as my gift to you, reader, is my personal chocolate cake recipe, printed for all eyes to see for the very first time. I encourage you to experiment with it for yourself.

Kate’s World Famous, Extra-Specially Good Chocolate Cake
(adapted from the Atlanta Journal-Constitution)

2 cups sugar
1¾ cups all-purpose flour
¾ cup unsweetened cocoa powder
1½ teaspoon baking powder
1½ teaspoon baking soda
1 teaspoon salt
2 large eggs
1 cup milk
½ cup vegetable oil
2 teaspoons vanilla extract
3 tablespoons unsalted butter, melted
1 cup boiling water

1 stick unsalted butter, at room temperature
powdered sugar, somewhere around 2-3 cups
cocoa, about 1-1½ cups
about ¼ cup milk
1 teaspoon vanilla

Preheat oven to 350ยบ. Grease and flour 2 9-inch round baking pans. In a large bowl, stir together the sugar, flour, salt, cocoa, baking powder, and baking soda. Add the eggs, milk, oil, and vanilla and beat on the medium speed of an electric mixer for two minutes. Add the butter and mix in completely. Stir in boiling water, carefully (the batter will start to smell a little bit cooked, and will be very thin – don’t worry, this is normal and good). Pour the batter into prepared pans. Bake for 30-35 minutes or until a toothpick inserted into the middle of the cakes comes out clean. Be careful not to over bake – no one likes dry cake! Cool for 10 minutes in the pans and then carefully flip out onto wire cooling racks. Cool completely.

While the cake is cooling, make the frosting. I always eyeball my frosting and probably make it differently every time. The process is very simple, though, so feel free to experiment. First, cream the butter with an electric mixer until it is smooth and fluffy. Add about ½ cup of powdered sugar and mix until it begins to lighten. Add a similar amount of cocoa and mix to blend. Continue alternating between sugar and cocoa until it tastes the way you like it, and it looks like you have enough to frost the cake. If the mixture gets too stiff, add milk until it returns to the correct consistency. At the end, add the vanilla and mix until blended.

Once the cakes are cooled, place the less-pretty cake (one is always less pretty) on a plate and spread a generous layer of frosting on top. Carefully flip the other cake – rounded side up – on top of the frosted piece. Generously coat the cake with the remainder of the icing and serve to all of your friends.