Tuesday, May 17, 2011

Lessons in Leftovers: Turkey Rillettes

Possibly the biggest perk (slash trade secret) of working for a food publishing company is the take home fridge. It sits in a room behind the kitchen, and daily fills up with the remains of recipe testing. Sometimes I find dozens of deli containers of chocolate pudding, or tomato sauce, or even tater tots. Other times, I scout fruits and vegetables too bruised and battered for a photo shoot, or rare pantry items no longer useful in the kitchen. Today was a pretty good day: I brought home two leeks, a small jar of olives (only a few missing), half a block of semisweet baking chocolate, half a bag of semolina flour, and a small container of dried figs.

Usually I’ll get really excited about my finds when I grab them, but when I get home and empty my grocery bag on the table, I sigh and scratch my head.

Not wanting to waste a bit of my free groceries, I’ve tried to get as creative as possible using up my leftovers. Some days it is obvious, like the day I snagged a raw rabbit, already broken down into easily braised pieces. Into the Dutch oven it went with a few vegetables, wine, and stock. Served with bread, it made my dinner for at least a couple days.

Other days, like last week, when I brought home a few bags of whole grain flour and a generous piece (cough half a cake cough) of chocolate-almond torte, I end up stashing my loot in the freezer until some kind of inspiration/chocolate craving strikes.

I’ve gathered over half a dozen flours, beans, grains, and parmesan rinds this way, slowly using it all up over months at a time, and greatly reducing the last minute trips to the grocery store. It’s awesome.

But I’m not here to brag about my job or anything. I’m here to talk about potted meat.

This past weekend, I attended a canning party/potluck with some good folks from food52. I was planning on putting together a cheese and homemade crackers spread, but once I got down to the cracker-making part late last week, I realized the platter needed a little oomph. A little meat oomph, if you will.

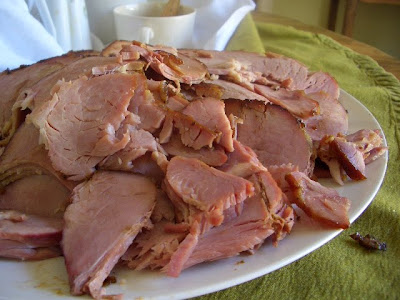
As luck would have it, that day I had snagged a generous box of braised turkey (thinking I would feed it to Matt over the weekend). Along with the (fantastic) homemade pancetta I already stashed in the fridge, I figured I could whip up some kind of quick rillettes. Rillettes are a French meat preparation (many times with pork or duck, but, use what you got!) consisting of slowly cooked (or confited) and shredded meat, smashed up with stock and fat, pressed into a small container, and covered with more fat. (This copious amount of fat helps to preserve the meat (and to keep it moist and delicious)). The rillettes are chilled at least overnight to flavor and set the spread, and then served at room temperature over bread or crackers.

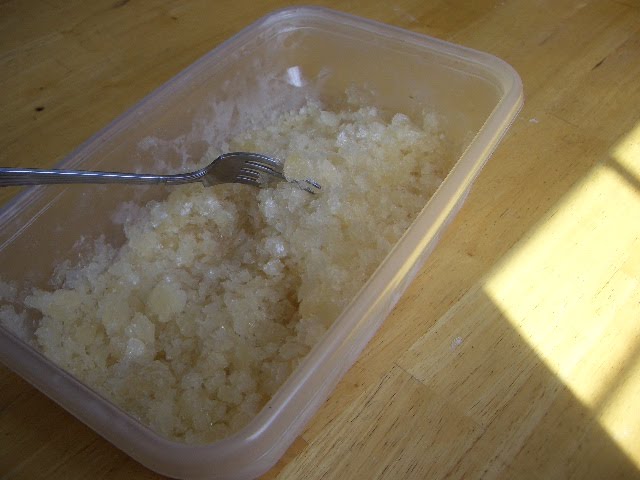
For my turkey version, I removed the leg and thigh meat from the bone, shredding the meat, and simmering the bones (along with a carrot and half an onion) in a pot of well-salted water for a quick broth. I diced up the pancetta and rendered the fat in a generous glug of olive oil to use instead of turkey fat (most had already been rendered and removed during the braising process). Some of the stock and fat joined the turkey meat in my standing mixer, where it all got beaten and whipped into a frenzy/spreadable paste. My mixture fit perfectly into three 1-cup ramekins, where it got coated in a sizeable layer of pancetta-olive oil fat, wrapped in plastic, and stuck in the fridge overnight.

The final dish, while certainly not the product of painstaking technique, was still unctuous, gamy, and perfect for my cheese plate. Not bad for a box of leftovers.

Leftover Turkey Rillettes
Makes about 3 cups

1 bone-in braised or roasted turkey leg, skin removed*
1 bone-in braised or roasted turkey thigh, skin removed*
1/2 onion, peeled
1 carrot, peeled and chopped into 3-inch pieces
Water
Salt and pepper
1/2 cup extra virgin olive oil, plus extra for finishing
3 ounces pancetta or thick-cut bacon, cut into 1/2-inch pieces

1. Remove turkey meat from bones, and set meat aside. Place bones, onion, and carrot in large saucepan. Cover with water, and season with a generous pinch of salt. Simmer over medium-low heat until water takes on flavor of bones and vegetables, about 1 hour. Strain through a fine mesh strainer into 8-cup liquid measuring cup.
2. Meanwhile, heat pancetta and olive oil in small saucepan over medium heat until pancetta begins to sizzle. Reduce heat to low and continue to cook until all of the fat has rendered out of pancetta and remaining meat is crisp. Strain through fine mesh strainer into bowl.
3. Shred turkey meat into bite size pieces, and transfer to bowl of standing mixer fit with paddle attachment. Beat turkey on medium speed until broken down. Drizzle in about 1 cup broth and 1/4 cup fat, and continue to beat until moistened. Add more broth and fat until turkey reaches a moist and spreadable consistency. Season with salt and pepper to taste.
4. Transfer turkey mixture into 1 cup ramekins, packing tightly to remove air bubbles. Refrigerate, uncovered, until chilled. Drizzle remaining fat over top of chilled turkey mixture so that about 1/8-inch fat covers the surface. If necessary, add extra olive oil to cover. Cover with plastic wrap and refrigerate overnight. Serve at room temperature with crusty bread, homemade crackers, good cheese, and tart pickles.

*You could totally substitute chicken here. 4 braised or roasted thighs should do it. (I'd shy away from chicken drumsticks, since they contain so much cartilage.)

Monday, August 9, 2010

Right now, this is my favorite


Simple, quiet, unassuming: the first glance belies its rich, tart complexity. It is at once cold, tangy, creamy. I smear it on one half of a prune plum, layer it under granita, serve it with bread, eat it from a spoon.

Labneh cheese.

So effortless, yet so decadent. I vow to always keep it around.

Start with whole milk Greek yogurt.* I had a large container of Fage Total in my fridge so I used that. Use as much as you’d like, but I’d recommend that you use as much as you can. This stuff; it is a drug.

Take your yogurt and place it in a cheesecloth- or unbleached paper towel-lined fine-mesh strainer set over a bowl. Make sure the strainer balances over the bowl. Dump your yogurt into the lined strainer, cover with plastic wrap, and place in the fridge overnight. I think I let my sit about 12 hours and that seemed sufficient. Perhaps you can get away with less time.

Once the manna is thick, thick, thick (think barely whipped cream cheese), remove and place in a sealable container. Eat with everything possible.

*If you can’t find or can’t afford Greek yogurt, you can certainly use knock-off strained brands, or you can start with plain yogurt (the straining step will just take longer). And remember, this is cheese, not diet food, so stick with the full-fat good stuff.

Sunday, August 1, 2010

Pickles


I’ll just go ahead and state the obvious, get it out of the way, and move on. It’s been quite a hiatus over here. I didn’t know if I was going to come back here and continue writing, or move on and start anew. I wasn’t sure of this blog’s identity anymore (stories, recipes, politics, funny pictures: all or one or none of the above?), and that struggle was keeping me from doing what I set out to in the first place, namely, to write. And then I decided I wanted to keep going, to keep writing—writing at least something, but couldn’t get started.

So this blog turned one and I let it be. I moved to Boston, threw a going-away pie-party and didn’t tell you. I took a real person job (in! cookbook! publishing!) and let it slide. So I’m sitting here drinking tea in the Northeastern heat wave thinking about my kitchen and how to catch up.

My new job has blessed me with an abundance of extra food. Some days it is leftover chili, pie, chocolate cake, and (ugh) slow-cooker meatloaf. Other days it is extra produce from a photo shoot: shitakes and basil, habanero peppers and half-cut onions. I lug what I can carry home during a 30-minute stroll to my (hot, hot) 3rd floor walk-up, and lay it all out. On Thursdays I stop by the Coolidge Corner farmers’ market and buy the rest of my week’s groceries: local squash, carrots, early heirloom tomatoes, and the last of this mixed-up season’s blueberries.

My fridge is bursting at the seams, and spoilage is my mortal enemy.

So I’ve been spending my Saturdays getting to know my freezer and practicing the awesome art that is pickling. Using Momofuku as a guide, I’ve pickled carrots, ginger, jalapenos, asparagus, onions, radishes, and so many cucumbers. Quick vinegar carrot pickles go quickly, and sliced on the bias taste great in salads with walnuts and butter lettuce. The pickled ginger has been thrown in (another) salad with leftover work salmon, a spicy okra sauté, and straight into my mouth when I get home from work with a bellyache. My pickled asparagus is quite ugly: I made a soy sauce brine, and the thin spears shriveled up upon contact with the hot/salty/sweet liquor. But they sure taste good.

My best pickles, however, are my latest cucumber pickles—the brine is an agglomeration of ideas and recipes: a mixture of white and rice vinegar, onions, garlic, peppercorns, dill, fennel, and sea salt. They’re not sweet, nor sour, just cold, crisp, and preserved. I can take my time with them, knowing that they’ll still taste good next week.

And then there is the granita, the icy treat that requires no ice cream maker, no dairy, and no custard. I made a great one yesterday and I think you should try your hand at it too.

The method is simple: stir together a sweet, flavorful puree or flavored syrup (but make sure your syrup is watery; too much sugar makes for a gloppy granita). Stick it in the freezer in a shallow pan or Tupperware container. Wait 45 minutes, and stir with a fork. Wait again, stir again. Repeat. After a couple hours, you’ll have it: Italian ice, no corn syrup needed.

Here’s my recipe, but change it at will (a fruit puree would be a great addition; I’ve been eating my berries and stone fruit fresh, and quickly, so none of it makes it into these projects).

Ginger-Basil Granita

serves 1 for a week of desserts, or 4-5 all at once

1/3 cup honey

1 ½-inch knob of ginger, peeled and sliced into 1/8-inch disks

a few basil leaves

juice from ½ lime (about 1 teaspoon)

water

Stir together honey with 1/3 cup water. Add ginger slices and bring to a simmer over medium heat. Simmer until the ginger softens and the syrup has become spicy, about 10 minutes. Turn off the heat, add basil, cover, and let steep for another 10 minutes. Remove lid and let syrup cool for 10-15 minutes. Pour syrup into measuring cup and add water to measure 1½ cups. Pour into a shallow pan or Tupperware container and freeze for 30-45 minutes, or until mixture begins to freeze. Break up frozen chunks with a fork and stir. Return to freezer for another 30-45 minutes, and stir again with a fork. Repeat freezing and stirring steps until the mixture is completely frozen and flaky. If you forget to stir, don’t fret. You’ll just need to stir more aggressively once you remember.

Monday, April 26, 2010

Spotted at Super H Mart


I finally made it out to the Korean superstore a couple weeks ago, buying practical goods like somen noodles to mix with ginger scallion sauce, palm sugar, aji chiles, and Pocky


(apparently men only can enjoy dark chocolate).

I showed uncharacteristic restraint when faced with less edible


Did you know that durians are farmed close enough to Atlanta to earn the title "fresh"? Neither did I.


The most entertaining part about shopping here, however, is the shelving arrangements.
Should we combine coconut milk with Vermont Curry?


Or perhaps give dinner guests a choice between canned light Progresso and the less diet-friendly canned tripe stew.


The best part about Super H Mart, however, is the kimchi wall. I will be back.

Monday, April 5, 2010

Food Carts and Recipe Duels


Some meals are best left to restaurants. Long, multi-course affairs with wine pairings and a different amuse bouche for each diner or conceptual, intricate dinners decked out with foam and exploding truffles are beyond pleasurable, but not something most of us would want to make ourselves or even enjoy on the fly. And, much of the time, these are not the meals I crave, dream about, or plot to put together on a long Saturday.


Usually I want simple, straightforward food that tastes great and looks like it was made by human hands.

I think most of you do too.

There are several cities in our country experimenting with new ways for getting just this kind of food into our bellies cheaper, quicker, and better. Chefs are doling out meals ranging from fried-whatever-you-can-imagine and khao man gai to handmade local sausages and artisanal pizza, to hungry office workers, elitist hipsters and vacationing families. They’re brining good food to fast food wastelands and transforming parking lots into foodie meccas. Those of you in Portland, Seattle, New York, Los Angeles, Chicago, and Washington DC surely have eaten lunches, dinners, and late night snacks at your roaming squadrons of food carts, not realizing how fantastic these mini-kitchens are. I know I grew complacent.

But I now know how empty an empty parking lot can feel, and I now know how satisfying that 1:30 am cone of fries can be.

Atlanta, unfortunately, is home to archaic zoning ordinances that make it close to impossible to own and operate a food cart. These days there are a few cart-like vendors but, until the rules change, there is no way for carts to populate Atlanta like in other cities .

Luckily, it looks as if things might be starting to change.

The Atlanta Street Food Coalition, mostly made up of Hayley Richardson and Christiane Lauterbach have begun mobilizing current and future food cart owners and lovers to petition the city for change (go ahead and sign the petition here). They organized a great event a couple weeks ago to raise awareness for the chefs already trying to bring their creations to the street.

I hung around for a bit and tried some pretty good food, made simply and delectably.

Good Luck Bowl: collards, black-eyed peas, cornbread waffle

Coppa Pizza

Ginger Creme Brulee

Speaking of good and simple food, did any of you hear that two of the best sources for creating these meals at home, food52 and Cook’s Illustrated, are having a duel? Apparently they’ve been, um, exchanging words since this fall, and they are, right as I write, culling and/or developing recipes for roast pork shoulder and sugar cookies. The recipes will be judged on Slate and the winner will get the title of Best Method for Creating Foolproof Recipes (or something like that). Will it be the power in numbers that comes from internet-saavy homecooks or will it be the tried-and-true science behind a trained kitchen of experts?

Personally, I like both. I use cookbooks like textbooks and I love resources like Cook’s that provide a wealth of information along with their reliable recipes. I also think that online food site like food52 bring an impressive level of creativity and ingenuity that can inspire cooks of all levels to develop their own recipes and palates.

I ran my own little test this Easter, just to verify my two-is-better-than-one thesis Granted, my test was, um, the opposite of scientific and was pieced together after the fact, but I think that the strength of both publications shone through anyway.


In addition to Martha’s fabulous mac and cheese and an Italian Easter Bread recipe from Gourmet, I baked up a daffodil cake from the most recent Cook’s Country and a pomegranate molasses-glazed ham from food52 (a winner and editor’s pick).

The cake was seriously beautiful, and crazy-simple to make (as long as you can whip egg whites to a medium peak, you can bake this cake). The perfect complement to our strawberries and cream, its crumb was both delicate and creamy, and the hint of orange mimicked the warm sunshine in our backyard that afternoon.


The ham? Holy crap, it was good. The reddish glaze baked up into a complex, spicy caramel crust, and its je ne sais quoi permeated to the depths of the meat. I stood in the kitchen, long past full, picking at the crispy bits long after lunch ended.


Who needs a winner?

Thursday, March 25, 2010

So I started another blog

Mostly food-related, mostly unrelated, modest proposals is a collection of internet-y bits that I find interesting, funny, or gross (most of the time, all three).
Check it out.

Wednesday, March 24, 2010

All I've been eating for the past two weeks....

Hello, muffin.


It's been quite nice spending two weeks with you and all of your friends.

I'm glad I learned your almond butter secrets; you taste pretty good.

It is time, however, for you to find some new homes.

Anyone want one?
Or twelve?

Better Than The Bakery Cranberry-Nut Muffins

3½ cups unbleached all-purpose flour

1½ teaspoons double-acting baking powder
¼ teaspoon baking soda
¾ teaspoon non-iodized table salt
2/3 cup unsalted butter, at slightly-cooler-than room temperature
1½ cups granulated sugar
2 tablespoons creamy almond butter, at room temperature
2 large eggs, at room temperature
1¼ cup low-fat buttermilk, at room temperature
2½ cups fresh or frozen cranberries, chopped in half (if using frozen, do not thaw)
1 cup walnuts, toasted and chopped

Preheat the oven to 350 degrees and spray a 12-cup muffin pan with cooking spray. Spray the top of the pan as well as the inside of the cups.

Sift together the flour, baking powder, baking soda, and salt into a medium bowl. Set aside. Cream together the butter and sugar on medium speed of an electric mixer until lightened in color and well mixed, about 2 minutes. Turn off the mixer and add the almond butter. Return the mixer to medium speed and cream until combined. Add the eggs one at a time, continuing to beat at medium speed until smooth, about 45 seconds.

Gently fold in 1/3 of the flour mixture, followed by 1/3 of the buttermilk, until the flour just barely disappears. Fold in another 1/3 flour and then 1/3 buttermilk, and repeat once more, again, just until you can no longer see the flour. Do not over mix. Gently fold in the cranberries and walnuts just until incorporated.

Spoon the batter into the muffin pan, filling each cup so that it mounds slightly over the top of the cup. The batter should fill 12-18 muffin cups, depending on the size of the cup.

Bake 40-45 minutes, or until the tops are mounded, smooth and deeply golden brown, rotating the pan halfway through the baking time.

Remove pan to a cooling rack. Let the muffins cool in the pan for 15 minutes to set, and gently remove to a cooling rack for another 3-5 minutes. Eat while still warm.